Tutorial: Basic Hill
This example uses paint.net. You will need to download and install it to follow along. (You may also be able to use a different image editor of your choice.)
Important! When using paint.net, you almost always want "Aliased rendering" enabled.
This setting does not apply to some tools (like the Pencil) but it does apply to others (like the Paint Bucket).
If you see weird results, especially at borders, check to make sure you used Aliased rendering:

1 Step 1 - Setup
| #lang racket |
| (require hermits-heresy) |
| (save-template-image 'IoA-background) |
| (save-template-image 'IoA-mask) |
| "wrote to C:\\Users\\kramer\\Desktop\\basic-hill\\IoA-background.bmp" |
| "wrote to C:\\Users\\kramer\\Desktop\\basic-hill\\IoA-mask.bmp" |
Import both of these images into a new paint.net project.
Save that project as plan.pdn.
It should look something like this:
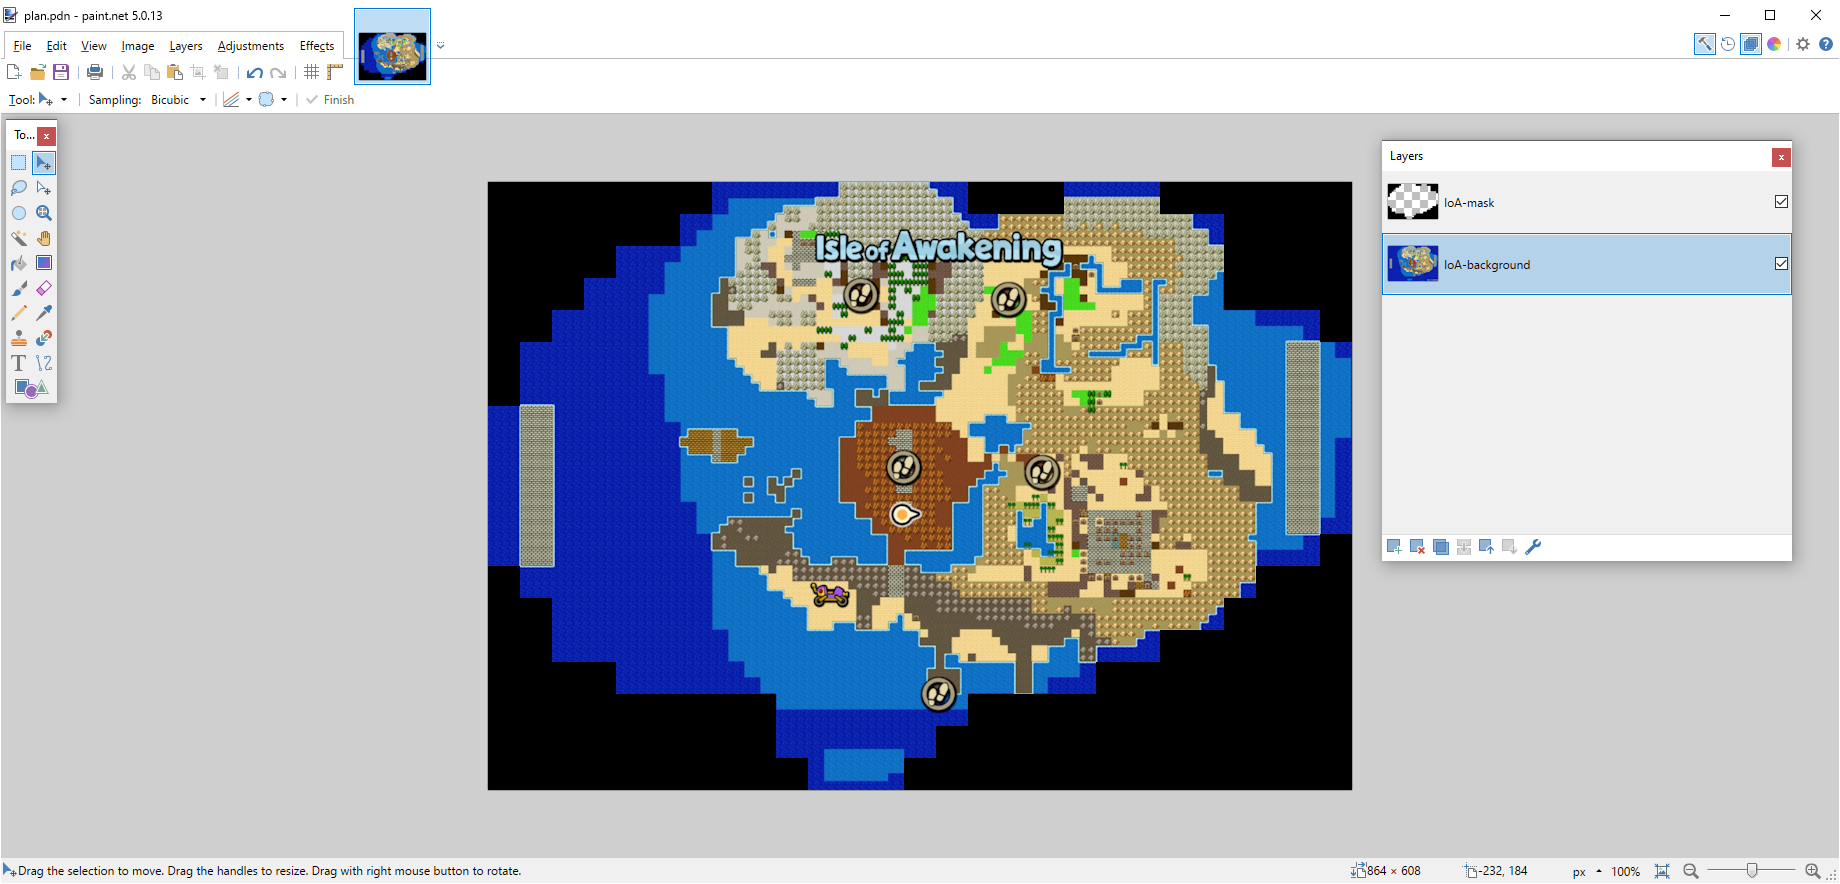
The IoA-background image may help guide you while drawing your hill. The IoA-mask image blacks out areas which cannot be built on.
2 Step 2 - Draw your Hill
Create a new layer in paint.net and draw a filled-in shape where you want your hill to be.
I used the Pencil and the Paint Bucket tools to draw a huge red hill covering much of the west side of the map:
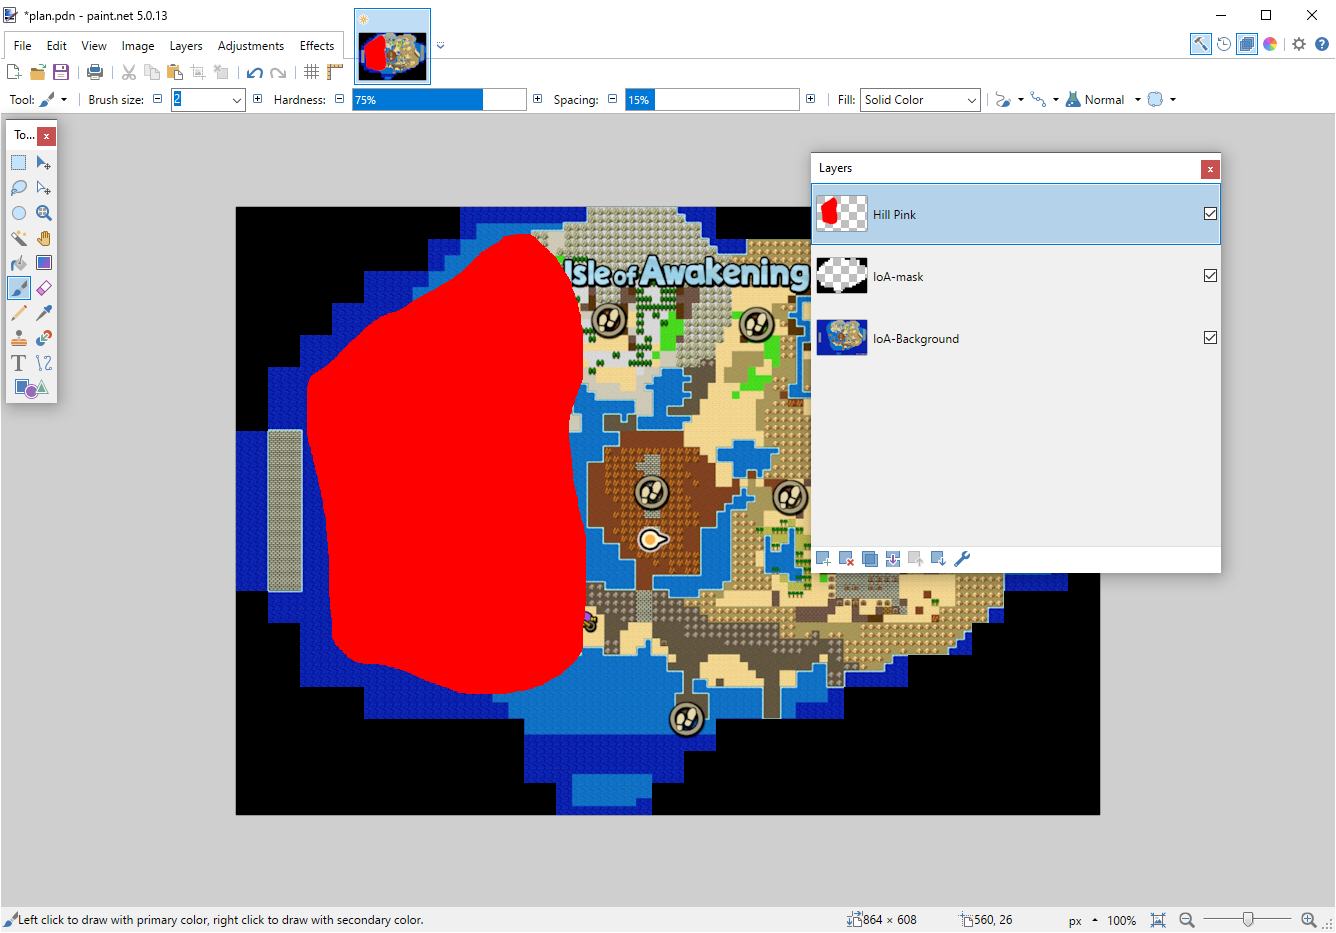
And because I’m feeling fancy, I’m going to add another layer and draw a smaller yellow hill
on top of the red hill.
You don’t have to do this, but I think it improves the demonstration:

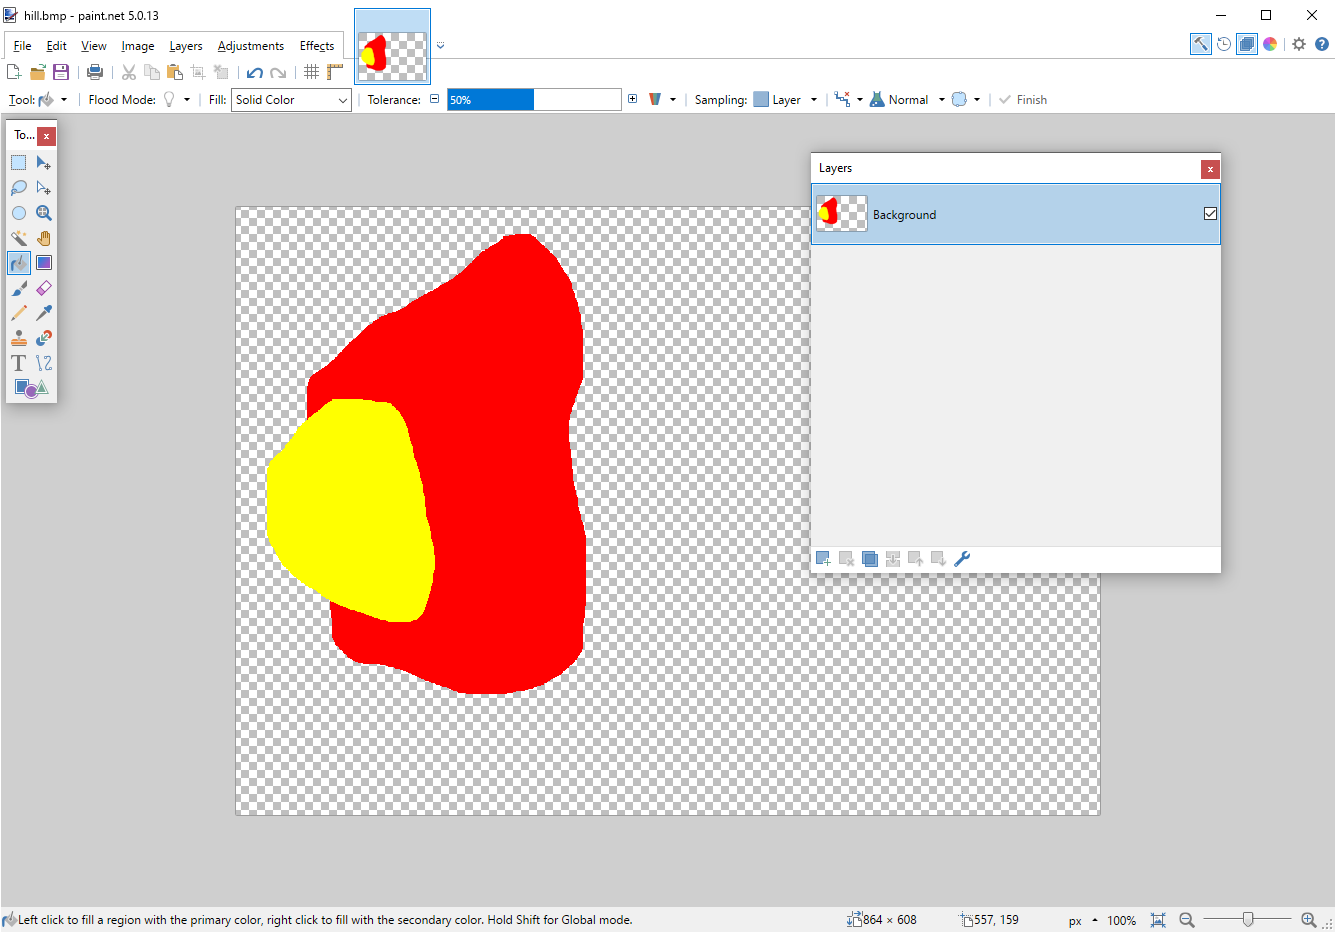
Now you need to export your hill in a format that Hermit’s Heresy can understand.
First, toggle the IoA-mask and IoA-background Layers visibility to off, because
we don’t want these in the output.
Now use File -> Save As to save just the hill data as a bitmap named hill.bmp.
Paint.net will allow you to adjust some settings like Bit Depth but I always just take the defaults.
You do have to Flatten the image to save as a bitmap, which is what we want anyway.
Now your paint.net should look something like this:
Finally, we need to color the hill to communicate the elevation.
You can read the documentation of bitmap->hill for more details, but basically
darker pixels correspond to taller elevation.
I paint the larger area with rgb(80,80,80) meaning it will be 40 blocks short of max height.
I paint the smaller area with rgb(20,20,20) meaning it will be 10 blocks short of max height.
I adjusted the Tolerance of the Paint Bucket down to 0% to avoid leaking from one section to the other.
The result looks like this:
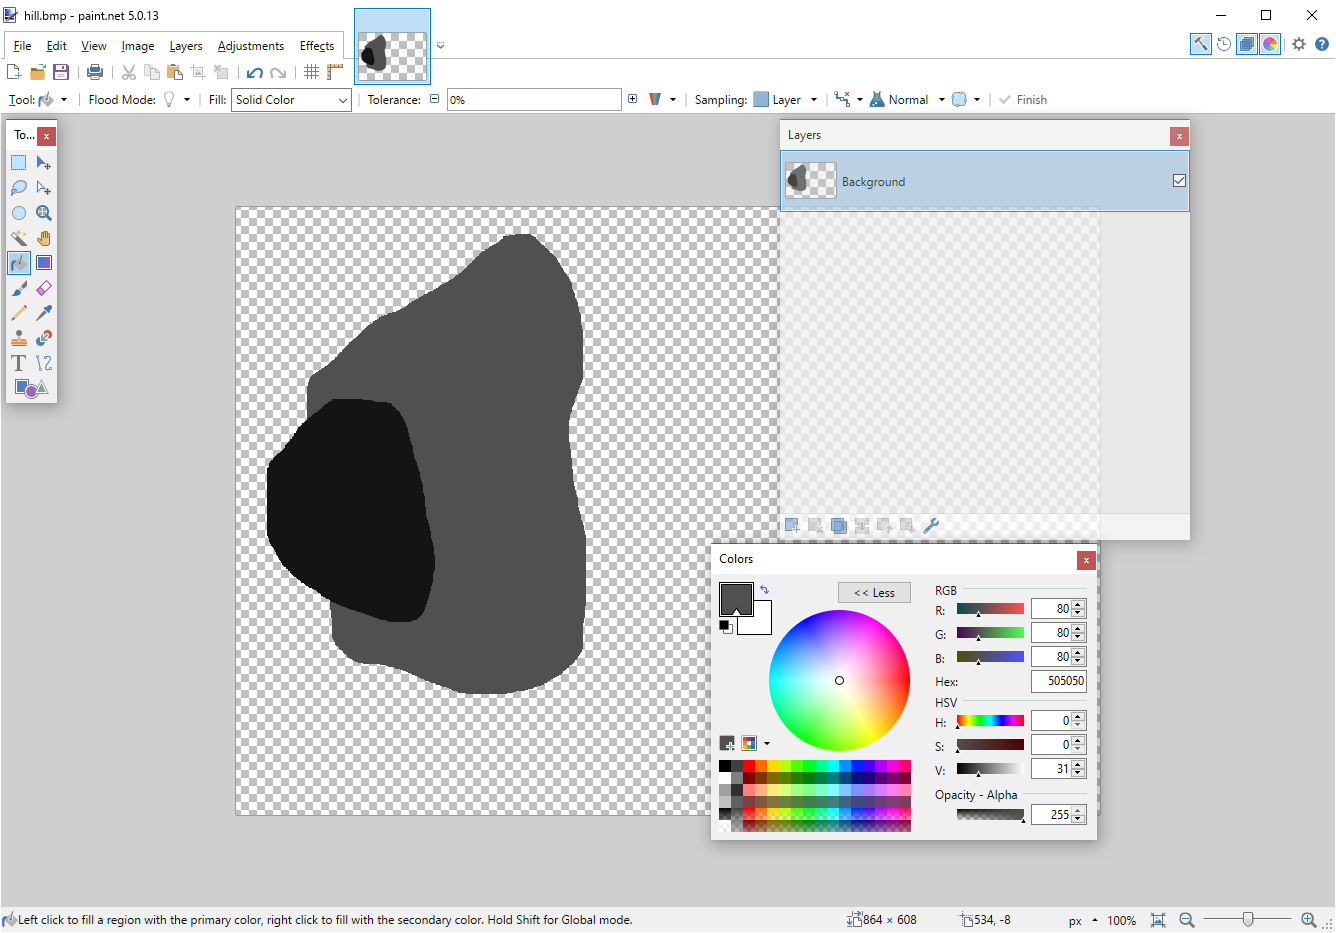
Also pay attention that the background is fully transparent. If you got a white background by accident, you can use the Magic Wand to select and delete the white pixels.
3 Step 3 - Place the Hill
(save-dir "C:/Users/kramer/Documents/My Games/DRAGON QUEST BUILDERS II/Steam/76561198073553084/SD/")
(copy-all-save-files! #:from source-slot #:to dest-slot)
(define stage (load-stage 'IoA dest-slot))
(define hill (bitmap->hill "hill.bmp"))
(save-stage! stage)
| #lang racket |
| (require hermits-heresy) |
| (save-dir "C:/Users/kramer/Documents/My Games/DRAGON QUEST BUILDERS II/Steam/76561198073553084/SD/") |
| (define source-slot 'B02) |
| (define dest-slot 'B00) |
| (copy-all-save-files! #:from source-slot #:to dest-slot) |
| (define stage (load-stage 'IoA dest-slot)) |
| (define hill (bitmap->hill "hill.bmp")) |
| (put-hill! stage hill (block 'Chert)) |
| (save-stage! stage) |
| "Copied 14 files from [...] to [...]" |
| "put-hill! placed 6712199 blocks, left 1705 items intact" |
| "Saved STGDAT file: C:/Users/.../SD/B00/STGDAT01.BIN" |
Over 6 million blocks placed! Sure beats doing it by hand if you ask me.
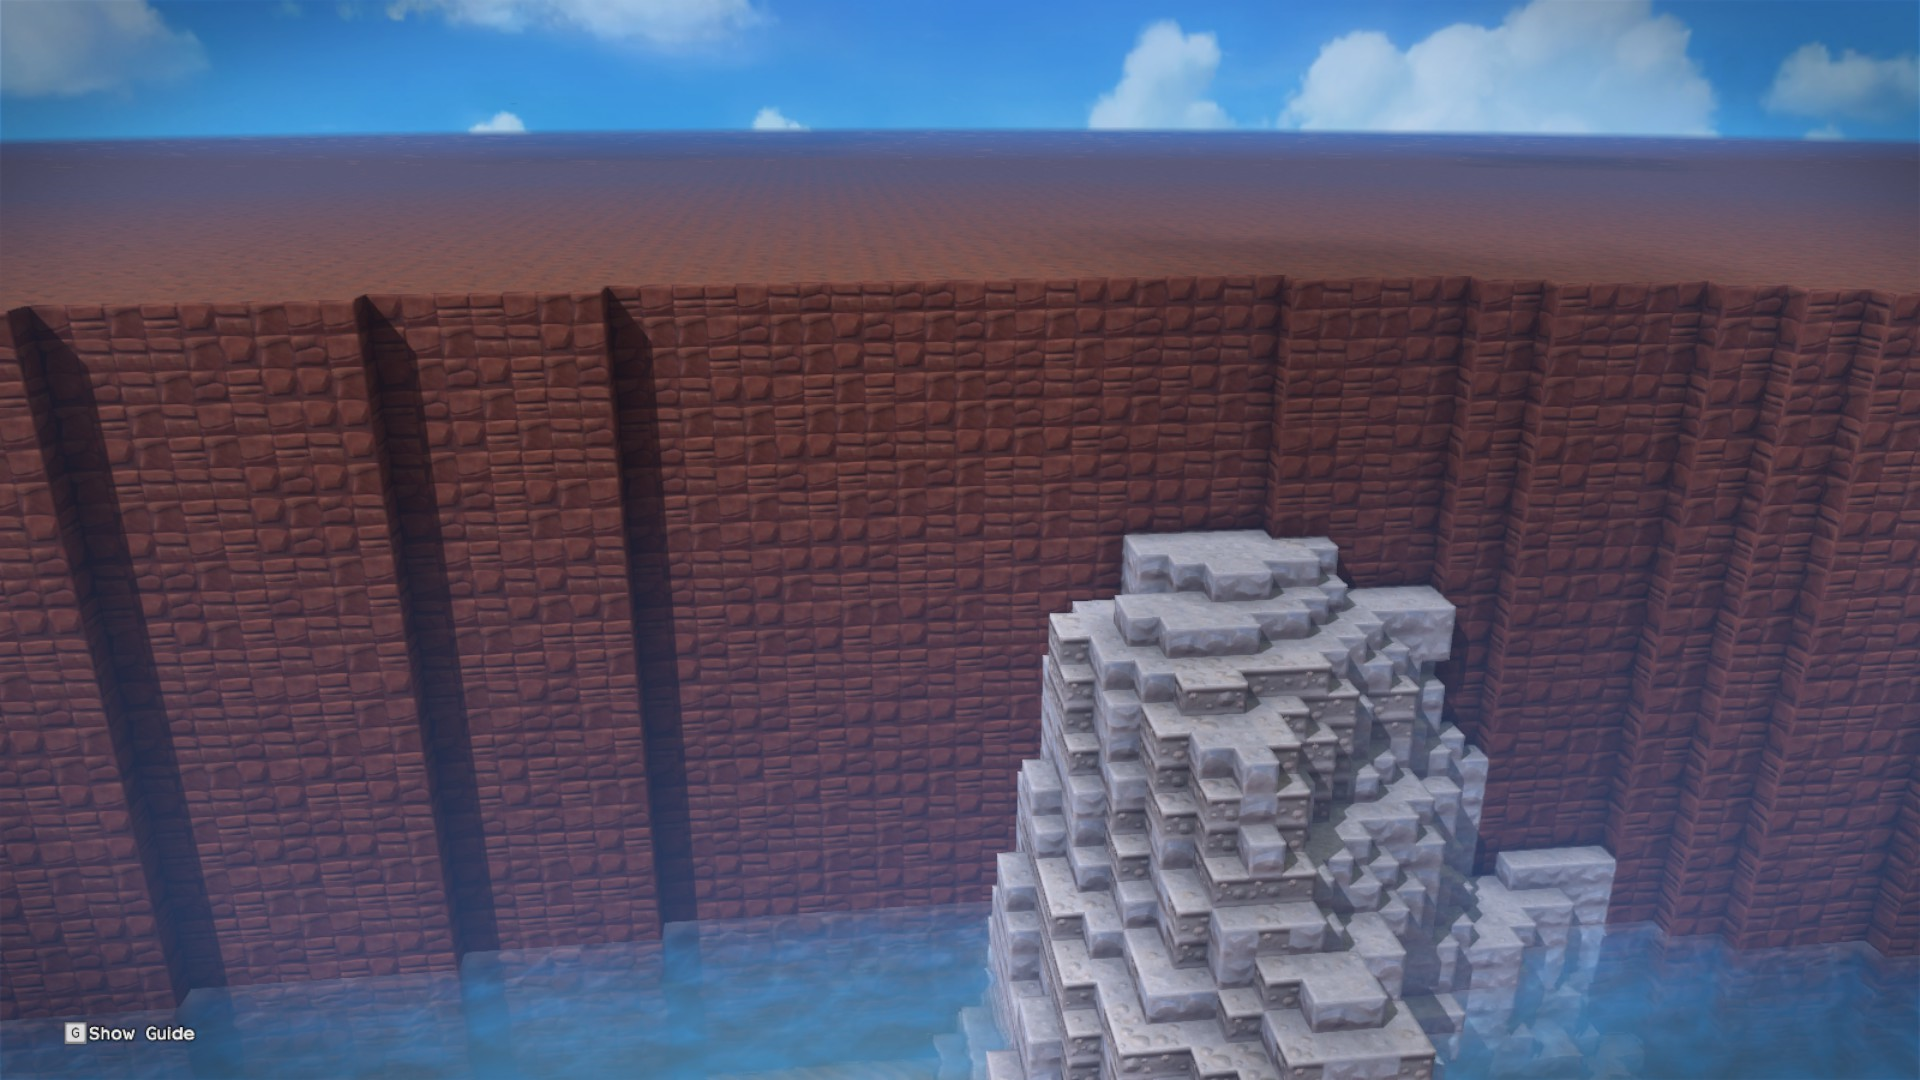
4 Step 4 - Validate Results
Start up DQB2 and load your save.
Take a look around and verify that it did what you want.
If not, loop back to step 2, adjust your drawings and/or your script, and repeat.
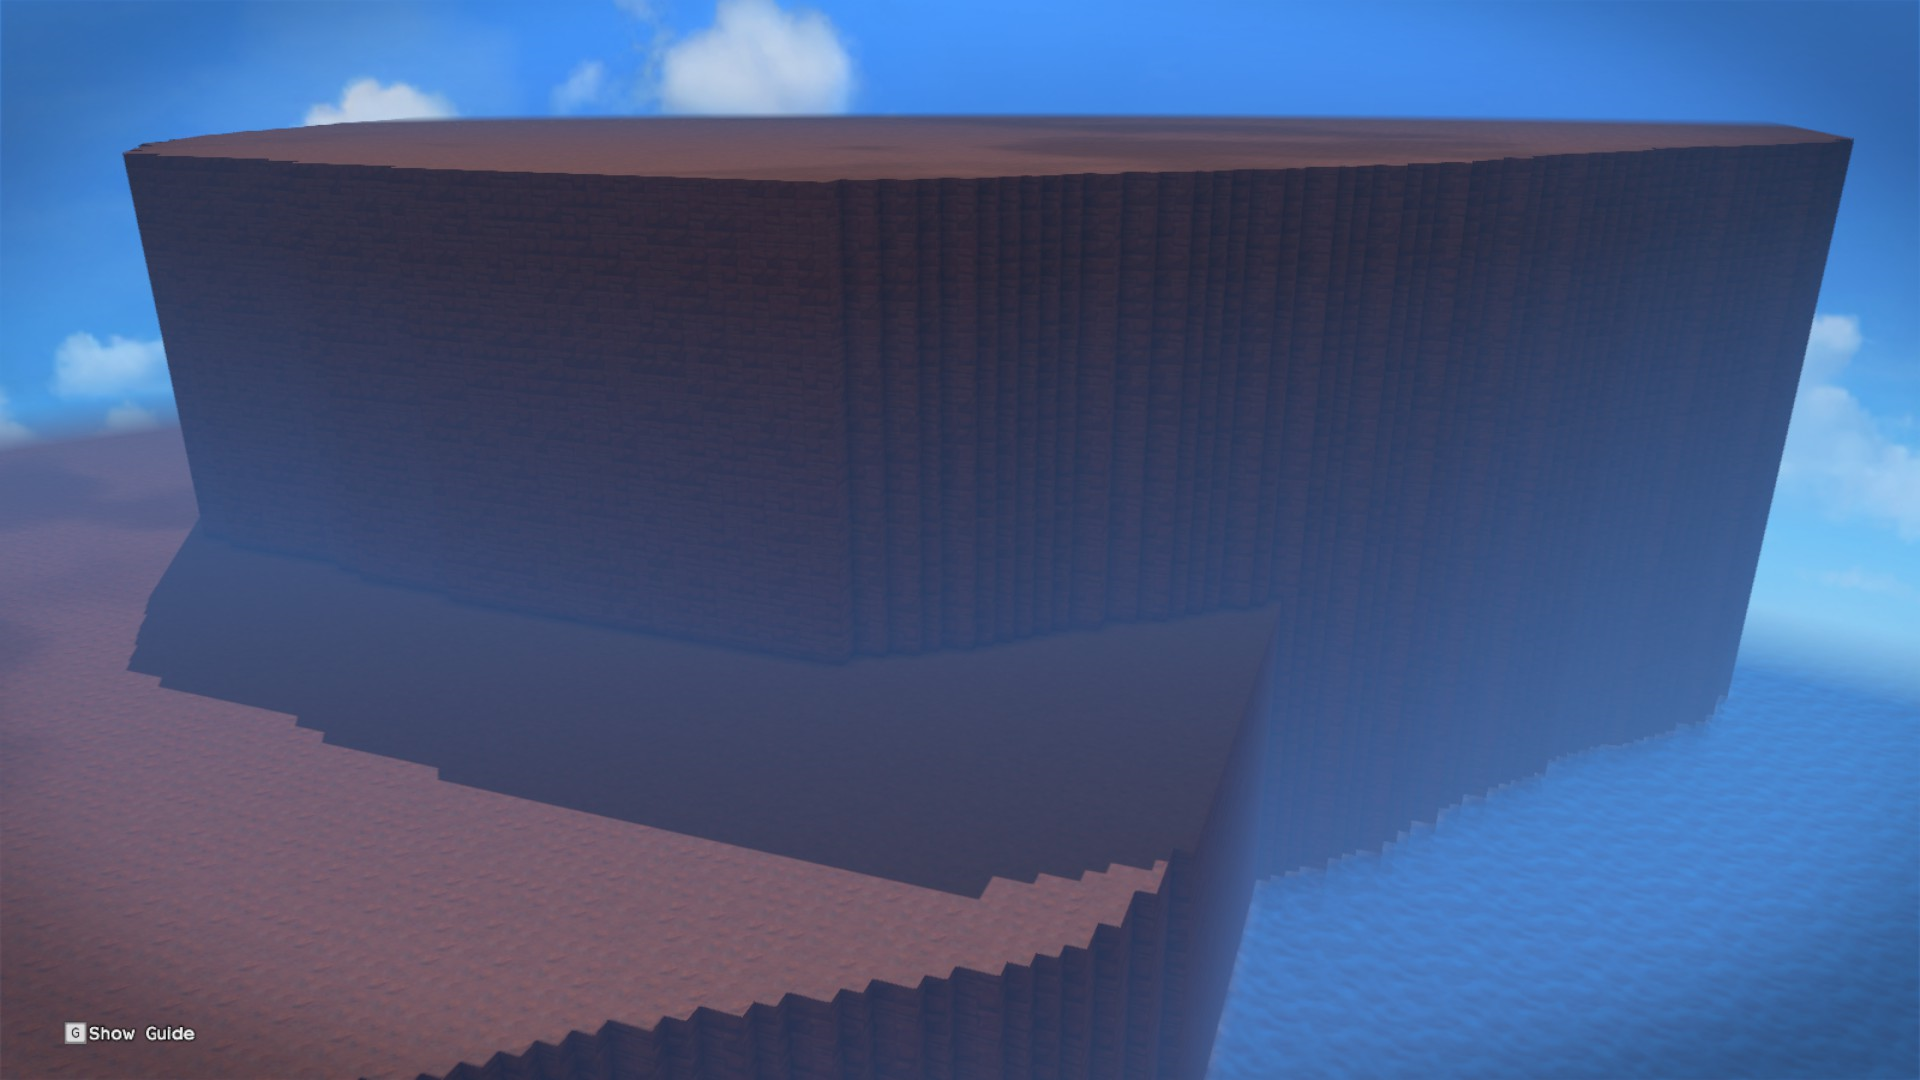
Here is a look at my hill, at the east side looking west:
And here is another angle, showing the back where I configured the two different elevations:
This example is also available on Github.
Continued at Part 2.